Showing posts with label Cheesy. Show all posts

Wednesday, October 10, 2012

Loads of Lasagna

My mom called me the other day to suggest I make my lasagna for my Dads birthday.  Of course I couldn't say no.  If we were going to celebrate this is the prefect dish to feed A LOT of people!  It's also one of those things if you are going to make it you mid as well make it worth your while and make the biggest dish you have avaliable!

I would love to say I follow a recipe for this but that would be a lie.  Recipes are overrated in my opinion.  People get so wrapped up in precision.  Baking is understandable but not with cooking.  People don't realize recipes are merely an outline of endless possibilities for the dish.  If you aren't going to add your own twist to it, go ahead and just order pizza or something.  

Like I said no recipe so I am just oging to throw some numbers out there for you too look at!!

Start with a large enough pot to cook  12 lasagna noodles in.  Not every lasagna noodle will make it so always cook extra!  Add plenty of water to boil, some olive oil so they wont stick, and salt to season the water. Cook until al dente, then pour out the hot water an cover with cold water to stop the cooking.   

I start by adding 1/4 cup olive in a pot.  I then add the seasoning I want to flavor my Italian sausage and ground beef with.  Rosemary, pressed garlic, onion powder,  Italian seasoning mix, crushed red pepper, salt and pepper.  I find ground beef sucks tons of flavor out of anything so I try to compensate here for that.  I cook that until they start to sizzle then I add my meat.  


 I use two packages of the italian sausage and just cut the casing.  Throw it in the pot then add about 1 pound of ground beef also.   You will want to brown your meat before you start assembling the sauce.  


Once the meat is browned dice 6 small portobello mushrooms, 


 open one baby of baby spinach


and add to the meat.  Let it cook down then you can start adding the goods.  


3 small cans of fire roasted diced tomatoes, 4 cups of tomato sauce and stir until thick and bubbly.  If you have trouble with your thickening once again you can add a slurry of 2 TB corn starch to 4TB of cold water.  Pour in a little at a time until desired thickness.


For the ricotta mixture I use the next biggest container to the 16 oz.  Honestly not sure if its 1 1/2 lb. or 2 lb..  Then add salt and pepper to taste.  Do not go beyond this point until you would want to eat the ricotta right out of the bowl.  Believe it or not if you add enough seasoning to it you would really like it!  After its seasoned add 1 heaping cup of parmesan and mix in well.  At this point you can add 2 eggs that are optional.  I find that I like to leave the eggs out.  
See those bits of parmesan?!  YUM!

So now that you have everything ready and waiting start by adding a couple ladles of sauce the the bottom of the pan.  This will prevents the layer of noodles on the bottom from sticking.


Then for my pan width I add 3 noodles laying them side by side, topped with plenty of meat sauce, dollops of ricotta and topped with fresh mozzarella cheese.  I repeat this process 3 times.   When I get to the final top layer i completely cover the lasagna with mozzarella.  I am one of those girls that loves cheesy bubbly lasagna.  If I was going light on this what would be the point?!

This is not my final picture before baking in the oven.  There is a lot more mozzarella on mine before baking!
Right after the cheese melts completely I turn my broiler on high and let it work it's magic.  I watch very closely cause it takes only a second for it to burn all your hard work up and not think twice about it.  Once the lasagna starts to bubble, boil an brown I pull it out and let sit for about 15 minutes before serving.  This give the sauce a change to tighten and not be soupy on everyones plates.


 This is one of those meals I consider a treat.  Although if John requested it every night you can bet your butt I would be in the kitchen making it for him.  You will be full off one serving and even though they may not be able to go back for seconds it will probably be requested many times after!


Friday, September 28, 2012

Cheesy Chile Enchiladas


It was a wonderful first day of fall.  I got up early that morning made apple fritters and drank a hot cup pumpkin spiced joe on the back porch with the hound dog.  It was quiet and quaint and the best part the hubs was about to make his way home!!  The previous night my sister Katie stopped by the house to drop off some fresh roasted hot hatch peppers.  Have I mentioned we are still devouring those suckers!  While I sit there drinking my coffee and eating my hot apple fritter a previous suttle comment of "make us something for dinner with those chiles we brought you" came to my mind.  I brought the idea to Johns attention an asked what I should make.  He suggested enchiladas.  Immediately all these ideas of something hot, spicy, cheesy, chiles with white sauce began to flood my mind.  I went to the store and bought enough to make a meal big enough to feed an army.  Of course my phone rings as I am carrying in my last load of groceries.  I answer it and sure enough they called him out on another job and John wasn't going to get to come home.  I let him know that I would still be making the chile enchiladas and his only request was to save some for him.


I start out by adding 1/4 cup olive oil to a pan turn up the heat to medium and begin adding your spices.  I added 1 TB of each cyan pepper,  diced garlic,  salt, pepper, & red pepper flakes.  I cook in the oil just until they start to dance then I add in a lot of chiles!!


I used close to 1 pound of chiles.  Once those have you coughing over the fire then add in your meat.  I actually cooked almost 2 1/2 pounds of beef for these enchiladas.  You probably want to use less if you are not feeding the entire block.


Cook your meat until its completely browned.  If you notice a lot of juice at the bottom of the pan I like to add 1 TB of flour and stir it in.  It will tighten that flavor to where you do not have to pour it out.  


While your meat is browning I go ahead and cook my tortillas.  30 to be exact.  I ended up making 24 enchiladas, and 6 of the tortillas were placed on the bottom of my baking dish to ensure nothing would get stuck to the bottom of the pan!  You can cook the white corn tortillas by adding 1 TB of oil to a pan over medium high heat and cooking for about 10 seconds on each side.  This is not really cooking it is just to loosen the tortillas so when you begin to roll them they do not break and tear.  It is very frustrating when that happens and you will probably swear you will never make them again.  Then you find yourself in the kitchen weeks later giving it another go.  True story.


Once you are done with the tortillas, we move on to the white sauce.  You can call it white sauce, sour cream sauce......Uh creamy white sauce whatever.  All I can say is it is nothing like the red sauce!  I usually slather sour cream all over mine as well but this sauce adds just enough of that creamy goodness that it's not needed!

Blanco Sauce

Melt:
1 stick of butter
1/2 cup flour

Add & Bring to boil:
32 oz chicken stock

Stir in:
16 oz sour cream
2 cups chiles


Add about a cup of the sauce to the bottom of the pan and begin rolling your enchiladas with about 2 TB of meat per tortilla.  I place the flap of the tortilla on the side to where it hugs the pan and doesn't come unrolled.  Once your pan is full pour as much as the sauce over the meat and tortillas.  I suggest most of it cause you do not want yours to turn out dry!!!   Finish by adding 3 cups of Monterey jack cheese to the top and baking at 350 for 30 minutes then 450 for an additional 10.


When everyone gathers at the dinner table for this meal there will be no sad faces.  The spice is enough to make your mouth water and the cheese is ooey gooey with every bite.


To finish my story from earlier.  John made it home in time for lunch the next day.  To his surprise we left him half the whole pan of enchiladas.  He lived happily ever after  =)


The End.


Sunday, September 9, 2012

Sweet Adobo Short Ribs with Green Chile Risotto


 Green Chile Risotto

Start by pouring 8 cups of chicken broth in a sauce pan and bring to a simmer

In a fry pan drizzle 3 TB of olive oil 
add 1 1/2 cups arborio rice
white pepper & salt
as well as roasted and deseeded green chile's 


toast rice and green chile's


add 1 cup of white wine and let cook in rice 

 begin to ladle broth into the rice one at a time until completely absorbed by rice then add another

I use all 8 cups of liquid and it is perfect.  

*It depends on what kind of bite and texture you want your rice to have.  You may need more or use less.


Once you are finished adding the broth and it is absorbed then add 4 TB of butter and stir.

Add 1 1/2 cups of Monterey jack cheese and stir until creamy
 *parmesan is traditionally used but I decided to take another route with this chile risotto


Sweet Adobo Short Ribs

In your cooker of choice add

S&P a package of short ribs (some come with 4-6 ribs) place in cooker


Pour 1 can of Dr. Pepper & 1 can of Sprite over the short ribs
(the sweet from both drinks compliments the smokey peppers and it also help tenderize the ribs)

Put 1 can of chipotle peppers in adobo sauce on top of the meat

Sprinkle 3 TB dark brown sugar on top of the meat and peppers


 I cook my short ribs in a pressure cooker for 1 hour and 30 minutes.  You can do this on the stove top or even in the oven as well.  The cook time would need to be increased to 6 hours and cook on 350 in the oven and over medium on the stove top with the lid on both.


I start making my risotto 1 hour into the short ribs cook time.  This gives me the chance to plate them both up fresh and hot with no reheating needed.  The ribs will be tender and fall off the bone and served on top of the rich creamy risotto.  I even drizzle some of the sauce from the short ribs over the risotto.  The smokey flavor will wow your taste buds.    


The outline of this recipe but with no specific measurements and or details is derived from The Pioneer Woman.

Friday, September 7, 2012

French Onion Soup


French onion soup.  You maybe asking why in the world would she want to post a recipe for french onion soup.  Well my answer to your question is cause this soup can move mountains, make a cold heart warm and probably solve world hunger.  How do you like that for an answer?  Seriously though people who have never had this soup and even people who don't like onions have been amazed at how wonderfully delicious it is.  On a cold winter day or a windy Texas Panhandle evening this will hit just the spot.  As you have heard me mention my handsome hubby does not like onions.  Well he just so happened not to be able to make it home for dinner therefore the recent drop on temperature gave me a hankering for none other onion soup. 

You must note that before I got started in the kitchen I went and turned on my Dean Martin Radio station on Pandora.  My house was instantly filled with the come hither tunes of Dino, Ella Fitzgerald, Frank Sinatra and Billie Holiday.  There is nothing more comforting than good classy music and cooking.  If you have never tired it live a little.  Nothing can be better than smelling the dinner on the stove and the one you are cooking it for walk in and make you feel like you have completely out done yourself.    


I start by melting 1 stick of unsalted butter in a frying pan.  I even used 2 cloves of fresh garlic this time!  I just ran it through the press and voila crushed garlic!  Put a couple fresh sprigs of thyme and 2 bay leaves in there as well.  As that is melting away in the pan go get 3 medium white onions and get to chopping.  I cheated.. I used a awesome mandoline my mother bought me and John.  First time I used it and I can't believe I haven't used it sooner!   I must say it will def get broke in over the next several months!


Once you can hear the flavor of the garlic, thyme and bay leaves being extracted into the butter only then can you add your onions.  You are going to cook these about 20-25 minutes just until the onions are caramelized.  Be sure to get a couple dashes of salt and pepper on those onions as well.  Don't try to rush the process and undercook the onions by the way.  Remember this is french onion soup.  You want all that onion flavor you can get for this!  If you feel inpatient open that bottle of merlot you are going to eventually use in this recipe and get to drinking.    


Once it seems as though the onions have soaked up all the butter and you are left with a beautiful golden caramely onions that is when it is time to start pouring.  I never recommend measuring wine.  Not that I am some lonely wine-o house wife.  It's just you know when you have just the right amount.  It is something that is to taste.   If you seriously want to nag about measurements add a cup. Then pour another glass for yourself.    Continue stirring then add a heaping tablespoon of flour.  I did use whole wheat flour and turned out just as wonderful as when I use AP flour.  The point of the flour with the onions is it makes a slight roux, so once you start adding the simmering beef broth (by the ladel) it gives it more of a thicker comfort bite to it.  It is not just a thin peasant broth.  Once you add 2 liters of the broth bring to a simmer add a splash of red wine vinegar and continue to cook a few minutes more.  Do a taste test and if it seems as if it is missing something that salt and pepper won't fix you can add some beef bouillon.  This is not cheating and it will enhance that not so flavorful beef broth from a can.  Turn off the heat and get ready to bowl it up!


I went traditional as well with the gruyere cheese.  I finely grate 2 cups and pile high on top of my sliced baguette.   If you are going for a clean presentation stick them in the oven now and broil until brown and bubbly, then place on top of your bowl of soup or serve it on the side.  If you are going messy, all out, get in my belly style like myself, then fill your soup bowl 1/2 inch from the lip.  Depending on how big your baguette slice is you may need only one but I needed two to fill my bowl.  Then pile on the cheese and place under the broiler once again until brown and bubbly.  I love the baked cheese baguette so I serve it with extra slices on the side.  This soup is a classic.  You will not find something as simple as onions and beef broth that has this much flavor and can carry itself  as an entire meal.  So go turn on your jazzy tunes, fill up your wine glass and just try it.  Those onions aren't gonna make you cry.


French Onion Soup

 Melt:
1 stick of unsalted butter
2 sprigs of fresh thyme
2 bay leaves
2 crushed cloves of garlic
s&p 
until nice and sizzling

Add:
3 medium white onions & cook 20-25 minutes until caramelized
1 cup of merlot cook until soaked in onions
then add 1 heaping tablespoon of flour
cook 5 minutes stirring continuously so you don't burn the flour

Then add:
2 liters of beef stock or broth one ladle at a time
beef bouillon (optional)
splash of red wine vinegar
simmer 5-10 minutes

Broil on high:
2 cups finely grated gruyer cheese piled high on
sliced baguettes


Wednesday, September 5, 2012

All Hail Pizza Margherita

This pizza was first made in 1889 in Naples Italy for the Queen Margherita whom had come to visit.  The white cheese, red tomatoes and green basil were added as toppings to represent the three colors of the Italian flag.  Since then this very simple delicious pizza has been referred to as the Margherita pizza.

I didn't know anything of this type of pizza with no red sauce and no meat until the mid 2000's when my sister Katie took me to a pizza place in Galveston and insisted I had to try it.  I have been a loyal fan every since.  It wasn't until a couple years later I would even try to replicate this wonderful pizza.  If you have not had the pleasure in devouring several slices of this please follow the recipe below to get your mind blown.

I usually make my crust with whole wheat flour, I opted out of that and went with traditional bread flour today.  The results were lighter and a bit more airy than my usual crust.  I must say though it was wonderful.    

By the way this is a yeast crust.  If you have never worked with yeast get over your fear of doing so and jump right in.  It is intimidating thinking you may get the water too hot and kill the yeast or not get it warm enough and not get it activated.  Its really just a matter of being able to take a chance and getting your feet wet!  So turn up your Siriusly Sinatra station and let's get going!


Turn your oven up to 425 degrees

1 cup of warm water (turn the hot water faucet on the sink and wait until the water begins to warm count to 3 Mississippi and then start to fill the measuring cup)  I have done this routine since college and it never fails to get the yeast going.

Add .25 ounce packet of dry active yeast with 1 Tb sugar.  Give it a quick stir and set aside for ten minutes.


The yeast it's alive!  If your yeast unfortunately does not look like this picture on the right your water was either too cold or too hot.  Don't give up though rinse out the cup and try it again.  About 3 minutes into the yeast and water contact you will notice the yeast starts going off like fire crackers in the glass.  If you do not witness this change your yeast probably won't get activated.


While my yeast is getting all crazy I grab a bowl big enough to hold 2 1/4 cups of bread flour.  As I mentioned before you can substitute whole wheat flour for this as well.  Add 1 tsp of salt and for a bit more added flavor I add a couple shakes of Italian seasoning and 1/2 tsp rosemary.  This gives the crust a touch more flavor and character.

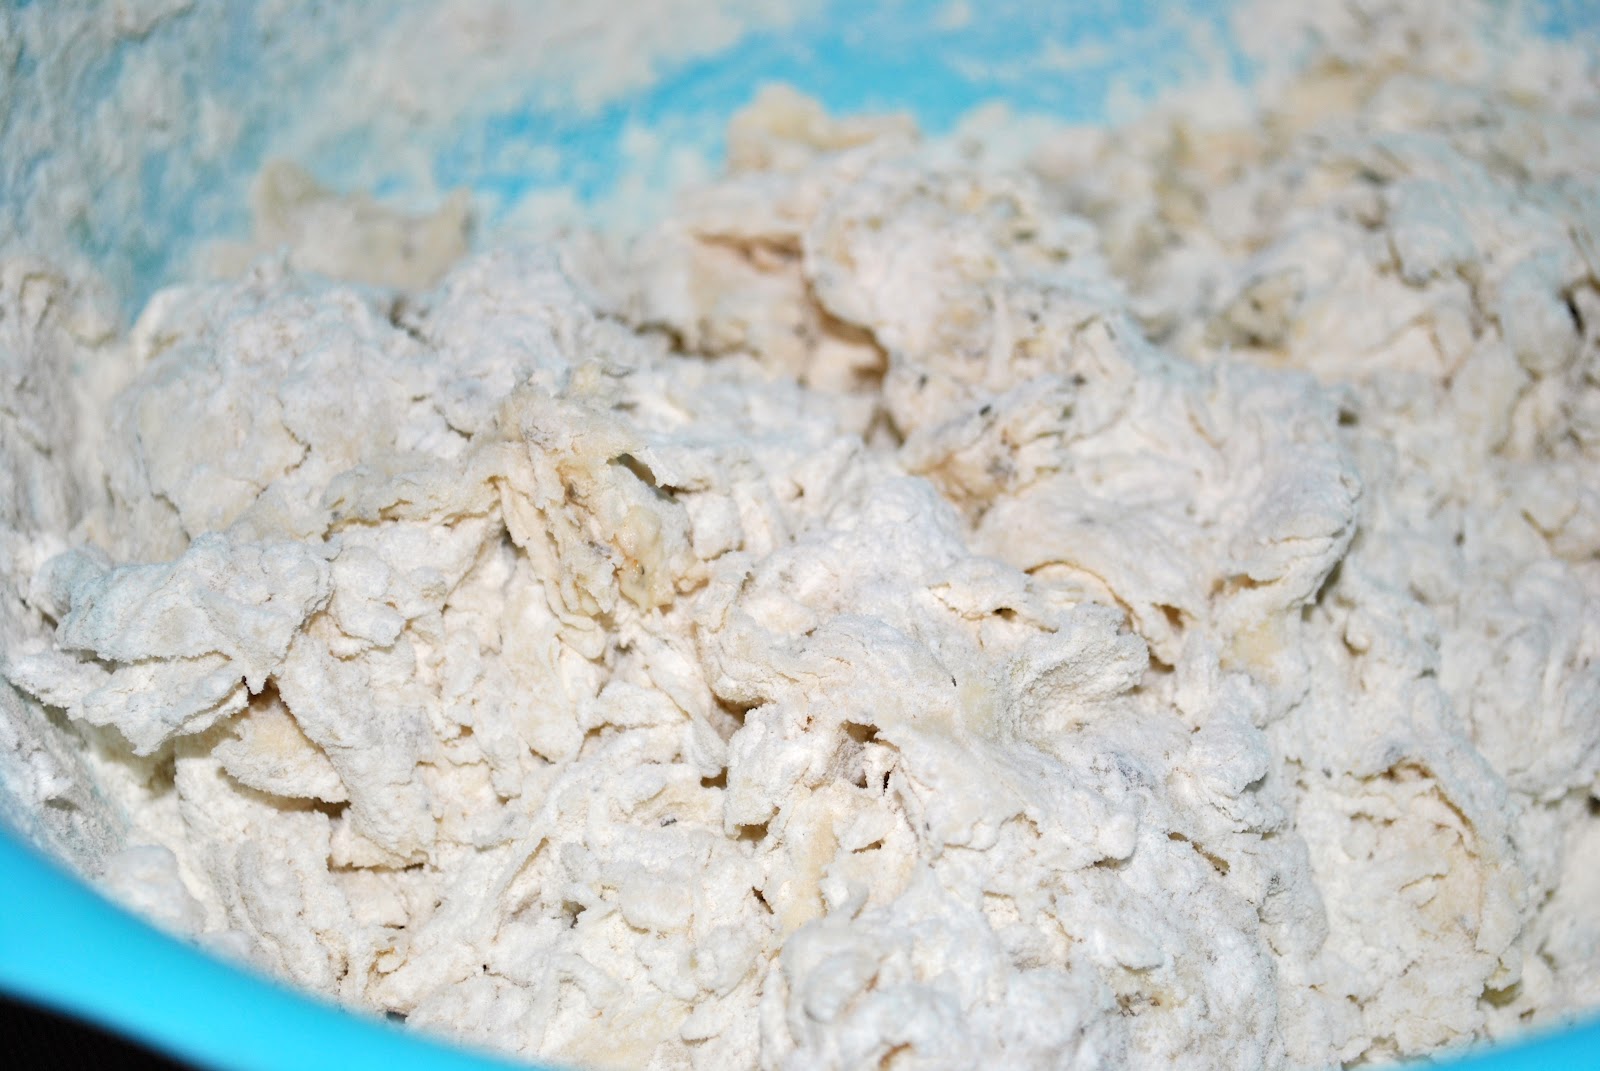
Mix your flour into the yeast water plus 3 TB of olive oil and stir.  Once you mixture resembles the picture below I put on my kneading dough hooks on my hand mixer and get to mixing.   If you feel as though it will never loose the dry look add 1 tsp of olive oil at a time until smooth consistency is reached.


After all this time with no pizza pan I finally bought a cheap one from the supermarket today!  Don't judge me.  Usually I would go all out on a stone one or something but today, today this was just what I wanted.  Go ahead and dust it with some corn meal.  This is really one of my favorite things about pizza.  If you are not a corn meal on the crust type of person then don't use it.  Also my pan visibly has holes in the bottom of it.  This means more air comes in direct contact and dries the crust more.  Meaning a crisper crust.  Just to ensure you don't make a mess place a towel or cutting board underneath.      

Now for the fun part.  I don't toss my pizza dough, I don't really know how or care to know so I place it on the pan start in the middle working it out until I have reached the dough to the width of the pan on all sides.  Once this is done I set it aside to let it rest and I start gathering ingredients for my toppings.  


 Since this is a Margherita pizza I am going to do a basil infused olive oil.  It is made by blanching basil in hot water, then shocking it in ice water to stop the cooking but make it hold that beautiful bright green color.  Instead of completely submerging the basil in a boiling pot of water I use a less treacherous tactic.  I steam 1/2 cup of it.  You will not believe how good your kitchen smells when you are doing this.  Seems less harsh also.  Instead of dunking it a ice bath I also just throw a few ice cubes on top and rinse off with cold water.    Place in a blender with 1/2 cup of olive oil a little salt and pepper and there you have it basil infused olive oil.  


Its time to start prepping the toppings for your pizza so go ahead and shred your cheese, cut your tomatoes and slice a few extra fresh leaves of basil.  I start off by drizzling the basil oil on the bottom of the crust determining how thick I want my outer crust to be.  I then do a layer of cheese followed by ripe tomatoes, a few extra grates of cheese then sprinkle fresh basil on top.  Melt 2 Tb of butter and 1 Tb of garlic in microwave then brush the outer crust.  Place in 425 degree oven for 17-20 minutes or until its as brown and bubbly as you want it.


 Once you pull it from the oven get your pizza cutter, slice it up into 8 pieces and get to eating.  This is a wonderful recipe that is easy to make and taste better than any pizza place in town.  The golden brown crust is crisp on the outside with a slight chew on the inside.  The aroma from the garlic butter will make your mouth water!  If you have never had a pizza with out red sauce give this pizza a try.  It has a clean fresh taste that won't leave you feeling guilty.  It is completely versatile as well.  Add anything you want to it.  John would prefer some meat on it but I grilled him a steak for the side.  At the end of the day I can honestly say I have never met a pizza I didn't like.  I mean come on its pizza!


Pizza Crust:
Add:
.25 ounces of dry active yeast
1 Tb sugar
To 1 cup of warm water
Let set 5-10 minutes until it's alive!

While the yeats is getting busy measure out 2 1/2 cups bread flour
1 tsp salt
a few dashes of italian seasoning
and 1/2 tsp rosemary

mix your wet and dry ingredients together
 add 3 TB of olive oil
*you may need more if you are being left with a dry looking dough
mix until a smooth dough is acquired

Cornmeal (optional) for the pan

Basil Infused Olive Oil:
1/2 cup balanched fresh basil
1/2 cup olive oil

Blend in blender

Use s&p to taste

Pizza Toppings:
Fresh sliced roma tomatoes
2 cups mozarella cheese
fresh basil

2 TB butter
1 TB minced garlic
Microwave and brush on the crust as well as drizzled over pizza 

Bake at 425 for 17- 20 minutes


Blog Design by Delicious Design Studio